Another Word for Ice Subzero Mortal Kombat Art Name
Welcome back to some other HitFilm and Blender tutorial. Today we'll exist showing you how to create some of the effects from our Sub-Nix vs Scorpion fight scene inspired by Mortal Kombat. We'll employ Blender, a free 3D modeling software, to create a wall of ice, breathing Scorpion's spear, and shatter the water ice wall. Nosotros recommend that you lot familiarize yourself with Blender before following along, so be sure to bank check out our Blender Masterclass.
Step 1: Pre-production
When recording your footage, be sure to take annotation of your lighting setup so you tin can hands replicate information technology digitally later on. Nosotros filmed our footage confronting a greenish screen as this allowed u.s. to place a digital matte painting backside the actors. If you want to pre-visualize your 3D surround while recording your video, you should check out our iOS* app CamTrackAR, which was recently featured in Apple tree's keynote event. To acquire more than about digital environments using CamTrackAR and Unreal Engine, cheque out Javert's tutorial linked hither.
Pace two: Create the water ice wall
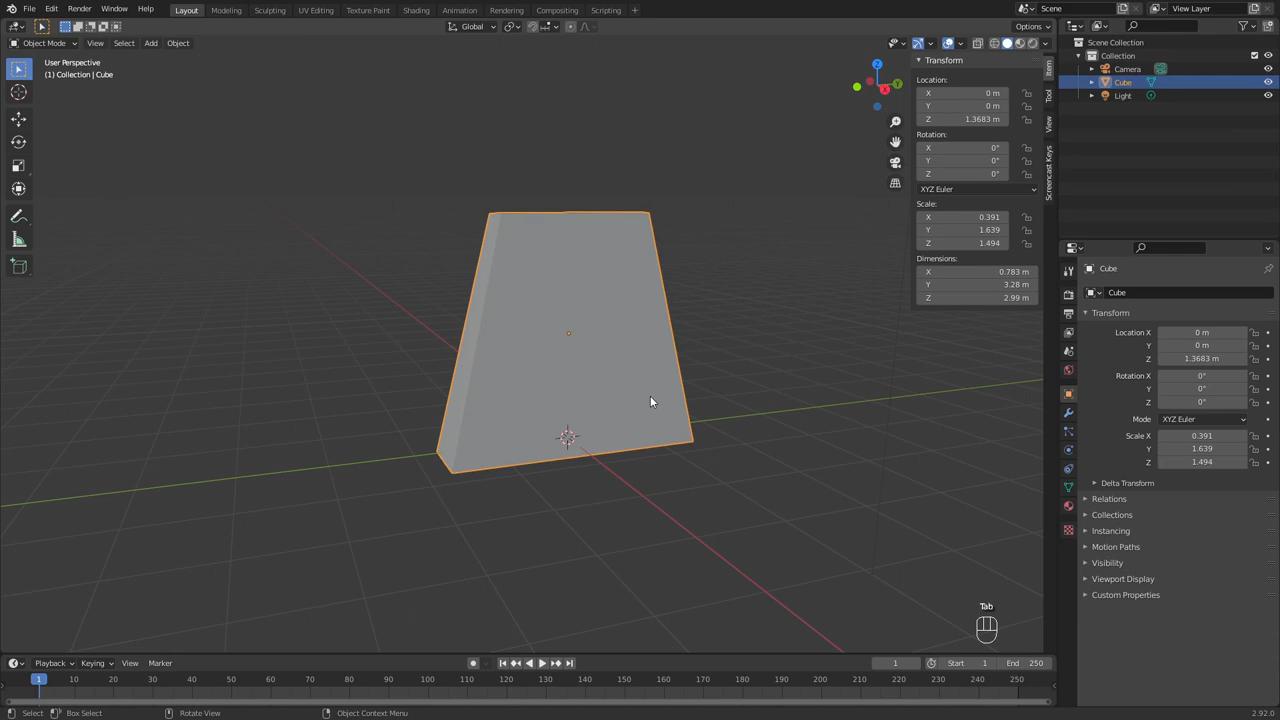
To create our water ice wall nosotros starting time demand to build a base structure. With a new Blender project opened, begin to scale the default cube to the desired size of your ice wall, and so tab into Edit Fashion. Select the acme confront of the cuboid and scale it down so the wall gets smaller towards the top.
With our base created nosotros can begin to create the icicles which will exist scattered over the prism's surface.
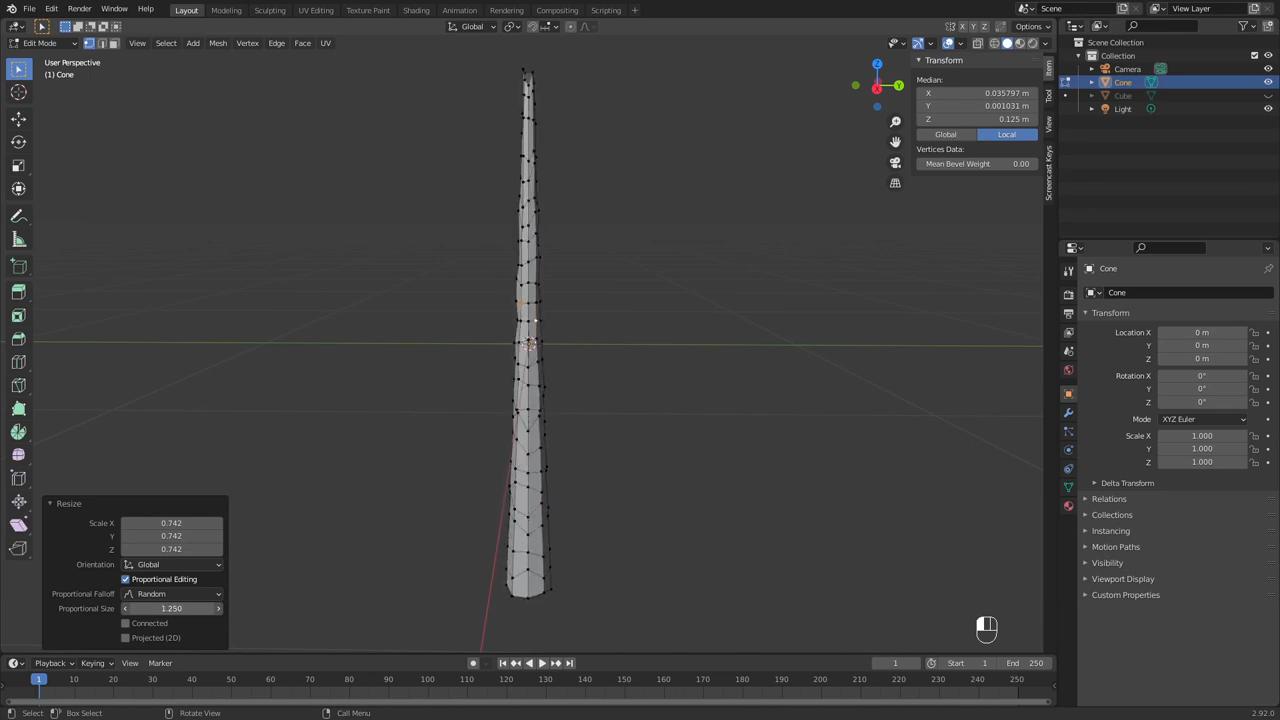
- In Object Mode, add together in a new Cone object.
- Adjust the radius settings to go far the correct shape, then go into Edit Mode.
- Next, add several Loop Cuts to create more geometry to work with.
- And so select two vertices and slightly scale them down and enable Proportional Editing, setting the type to Random – Changing the Scale and Size allows you to add some variation to the icicle's shape.
- Select all, then move the geometry so the origin indicate is towards the bottom of the object.
- Merge the tiptop ring of vertices to create a point.
- Dorsum in Object Manner, enable Shine Shading for this object.
- Hide the icicle from view, and so select the cube once again.
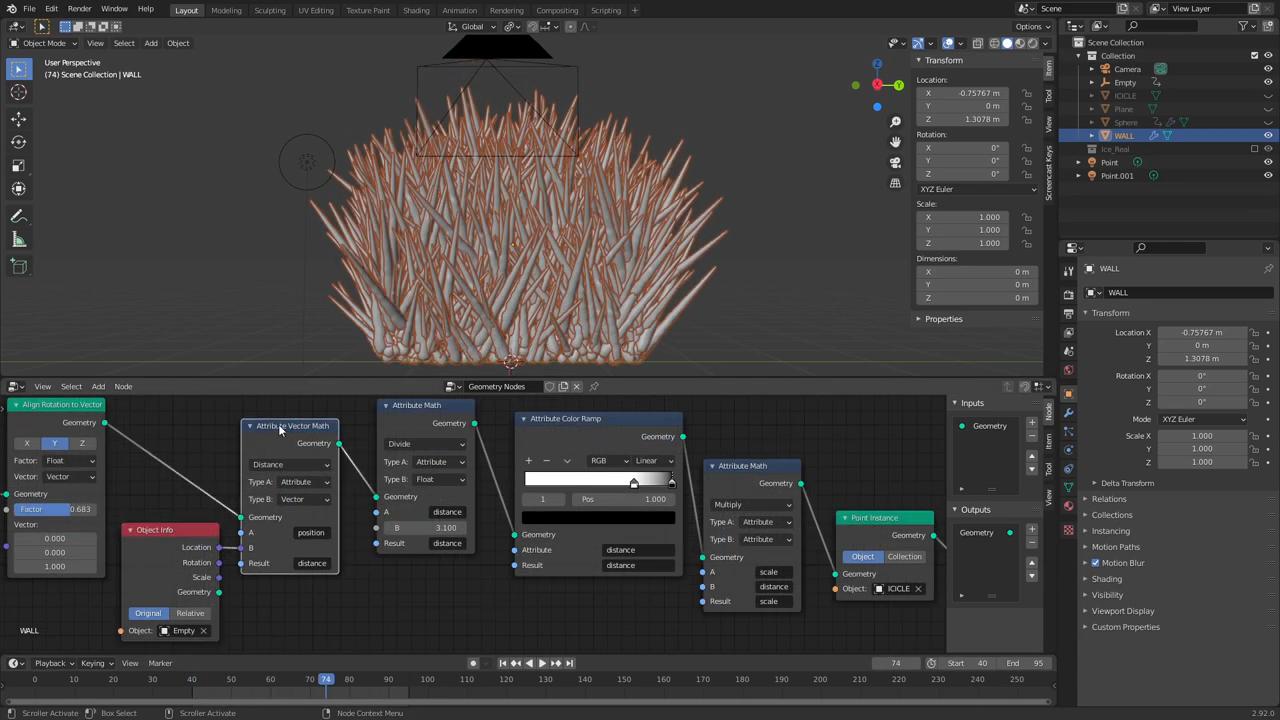
To besprinkle the icicles across the base'due south surface, we used Geometry Nodes. Begin by clicking and dragging the corner of the bottom window to add a new console, then set the type to Geometry Node editor and click the "new" button. Side by side, scatter some points past adding a Bespeak Distribute node. To add an icicle to each point, add a Signal Example node, selecting the icicle object. You can innovate some variation to the model past adding an Aspect Randomize node and setting it to Vector. Once set, blazon in "rotation" for the attribute and increase the Max values to ten. To make the spikes mostly point in an upwardly direction, add an Align Rotation To Vector node, selecting the Z-axis. Reduce the Factor setting to combine this with the randomized rotation. If the icicles announced to be stretched, apply the object'southward scale. Lastly, add some other Aspect Randomize node, this time typing in "scale" and increment the Min value and then that no icicles are scaled to 0.
Step 3: Animate the chain
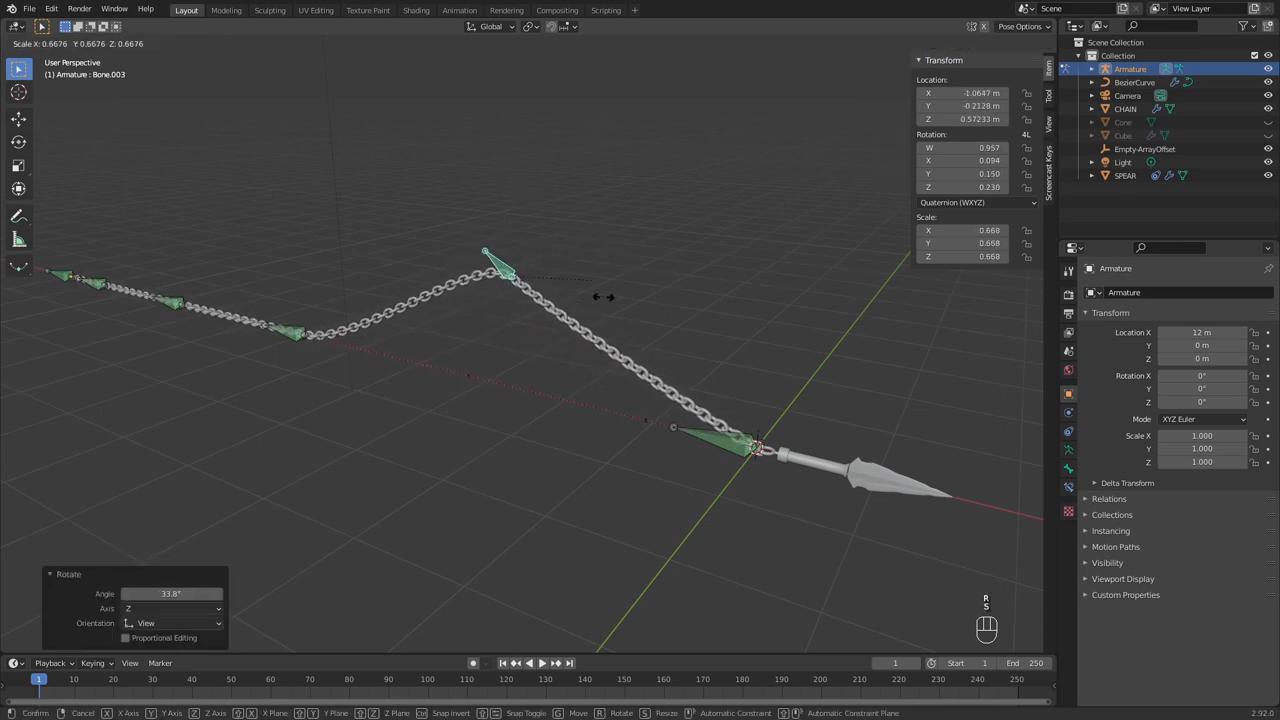
We have already created a rigged model of Scorpion's chain weapon in Blender, which you tin download here. To bring the model into your projection, become to File > Append. Navigate to the downloaded file, selecting all the objects. The chain was created along a Bezier Bend, and that Bend is attached to an Armature, allowing the shape to be inverse and animated. If the length of the Curve is altered, new concatenation segments are automatically created to make full the Curve. The Armature Bones have a 'Kid Of' constraint, targeting the terminal Bone in the chain. This essentially parents these Bones to that last Os, similar to parenting layers in HitFilm.
To animate the chain, brainstorm by moving the chain into place by moving the Armature; be sure not to motion the other objects. Past scaling that base controller along the X-axis, yous can extend or retract the chain. Once you take animated the concatenation length, animate the Influence of the 'Child Of' constraints. By setting these to nada, the other bones are no longer parented to the main control bone. This is helpful if you have tracked the base controller to your actor's hand, and don't want the other end of the concatenation to follow its movement. If the chain links appear too large for your scene, scale them downward in Edit Manner.
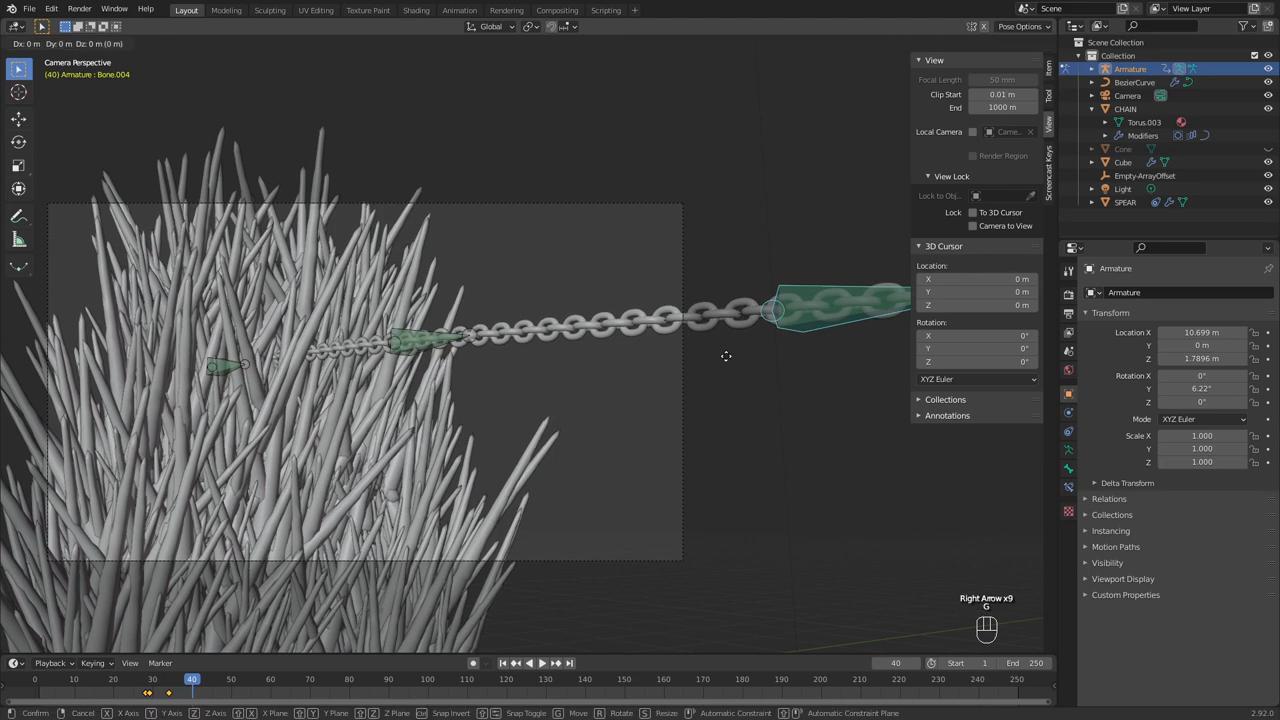
In one case the chain correctly positioned and extending through the water ice wall, manually animate the armature to get in announced less static. Commencement, motion the photographic camera into identify, and then you don't demand to animate anything that won't be visible. Select the Armature and go into Pose Fashion. Select each bone, and then breathing their location and rotation to add together more movement and interest to the chain. If y'all want to achieve realism, make sure to await at reference videos to run across how a concatenation moves in existent life. Manual animation similar this can take some time and effort, but gives you total control. Simulating the concatenation is an option to automatically create realistic movement, but it is harder to control for a specific result.
Step iv: Simulate the shattering event
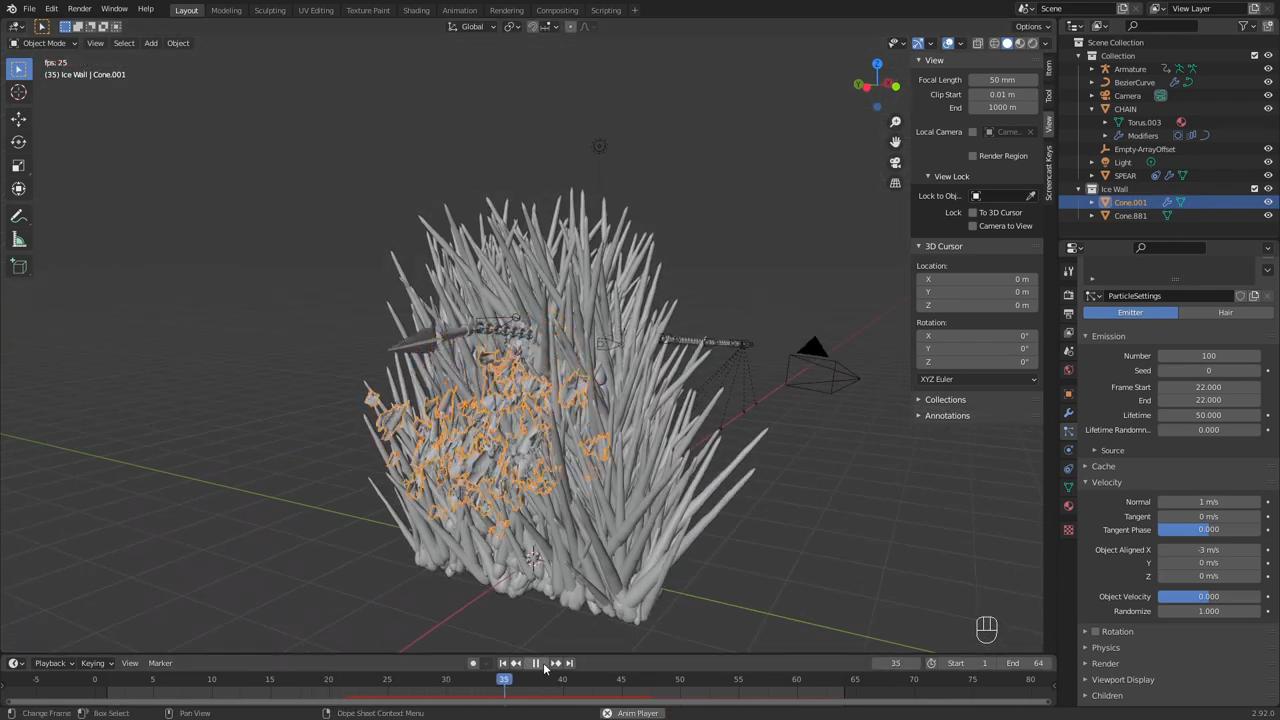
With your water ice wall built, and your concatenation animated, information technology is time to pause the ice. The quickest and easiest fashion to create the shattering effect is to use Blender's Quick Explode feature. Commencement, you take to convert your ice wall into an actual mesh, baking in the work you did with the Geometry Nodes.
- After saving your progress equally a separate file, select the object, go to Object > Utilise > Make Instances Real, and press Yard to put these objects into their own Collection.
- Delete the original Cone and Cube objects.
- Correct-click the new collection and choose Select Objects, so join them into i object with Ctrl+J.
- To select the area you desire to shatter, in Edit Mode, go into Wireframe view, then select the area using Circle Selection.
- Separate this selection into its own object.
- Get to the frame where you want the object to shatter, and select Object > Quick Effects > Quick Explode. If you lot hit play, your object should now shatter and fall down.
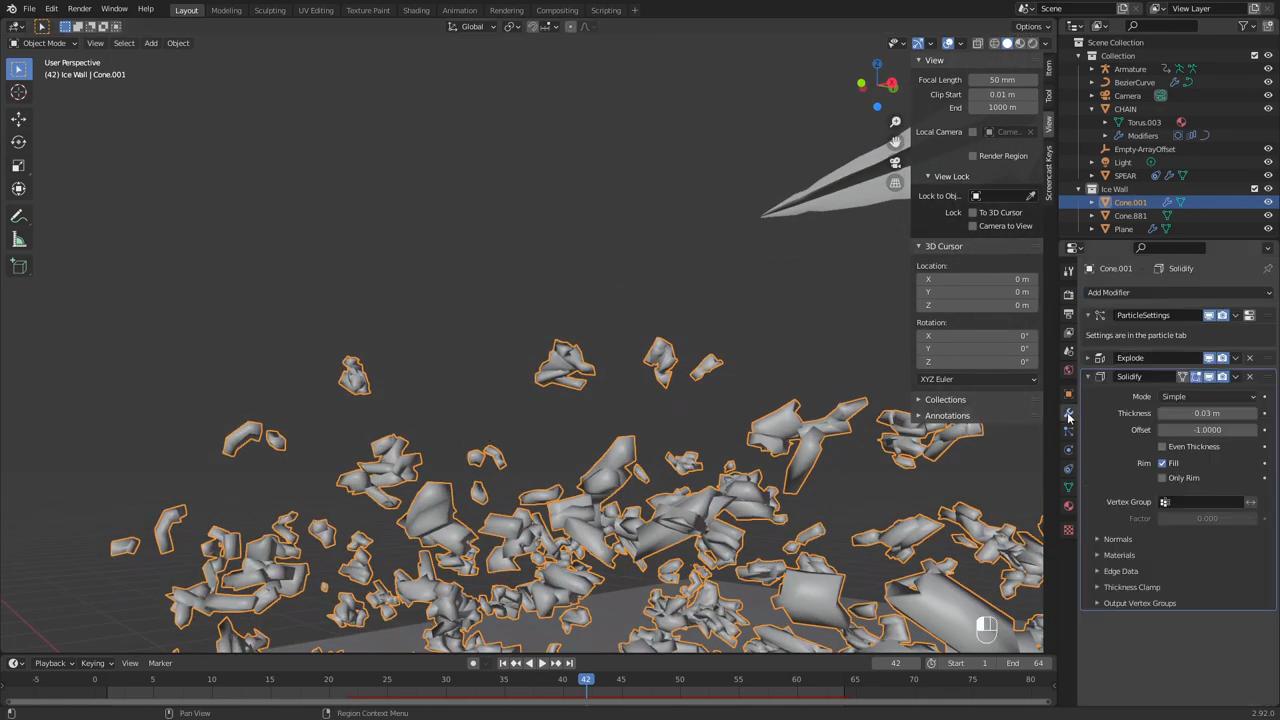
To accommodate the simulation settings to brand it appear more attractive, go into the Particle Properties, and increase the Velocity in the direction you want your particles to wing. If the angle seems off, make sure to Employ the rotation on this object. Enable Rotation and tick Dynamic to add some spin to the particles. If you demand your particles to collide with the basis, add together a new Plane object, calibration it up, and select Collision in the Physics Properties. Adjust the different values like friction to control how the particles interact with the footing. Once you are happy with your simulation, you can increase the Number of particles to create more small pieces and add a Solidify modifier so the shattered pieces have some thickness.
Stride v: Lighting and rendering
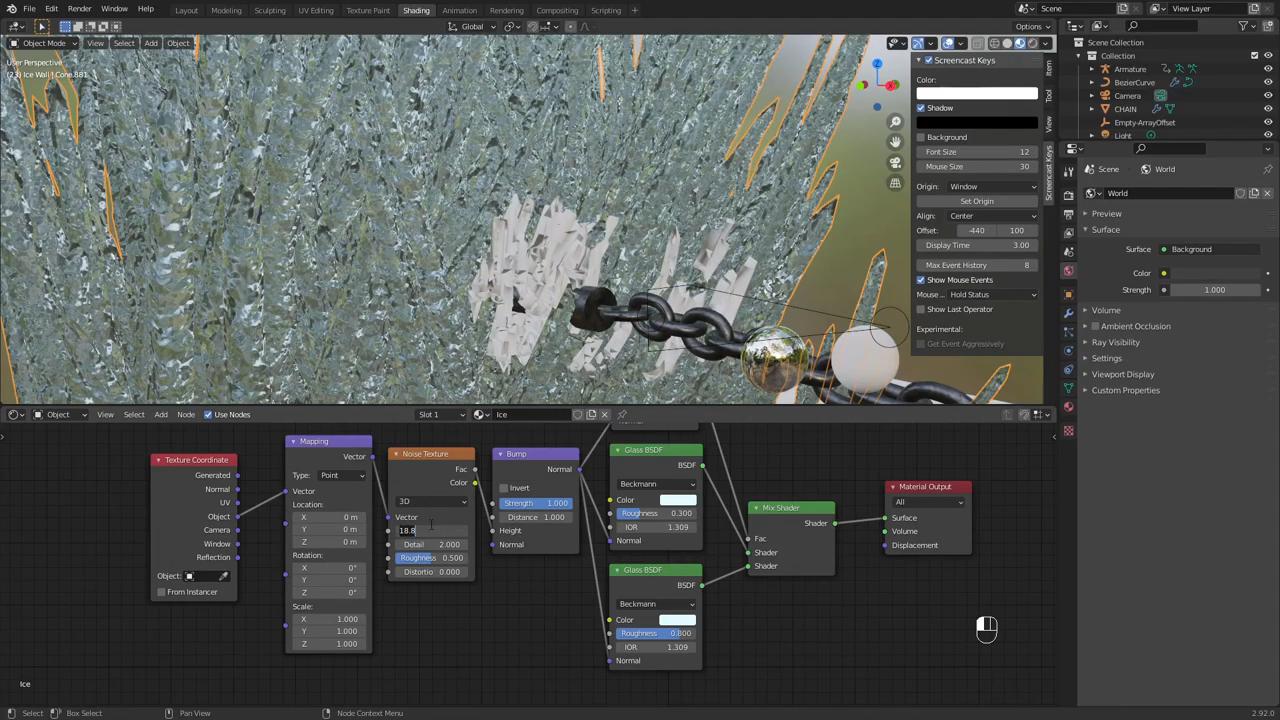
Now that nosotros have created and animated our model, we tin raise its advent with some lighting and realistic-looking materials. We rendered with Cycles, every bit it allows you to imitate the advent of realistic ice and drinking glass textures. If you have a fast graphics card, make sure to apply it for rendering instead of your CPU. Our concatenation object was already fix with a basic metal textile. In order to render the water ice fabric:
- Add a new material, and open up up the Shading workspace.
- Delete the default Principled Shader and add in a Glass BSDF.
- Give the glass a slight blue color, and increment the roughness.
- Set the Index of Refraction to that of ice, which is 1.309.
- To make this cloth more interesting, indistinguishable the Glass shader and increment the roughness.
- Combine these two shaders with a Mix Shader node.
- To control how they mix, add a Layer Weight node, plugging the Fresnel into the Factor input.
- To add some item to the ice, add a Noise Texture plugged into a Bump node.
- Plug that node into the Normal input of the other nodes and adjust the settings on the Noise to add some small bumpy detail to the ice.
To lucifer the lighting of the surrounding video footage, we added ii Betoken lights, one with a blue color, and the other with an orange color. In the Earth settings, we used the background image as the Environment texture to add some reflections. We enabled Transparent in the Picture show settings and then our render would have a transparent groundwork. Additionally, we enabled Motion Blur to requite the shattering ice effect acmore realistic advent. When you are happy with how your epitome is looking, y'all can create a new folder for the image sequence and render the blitheness.
Footstep 6: Compositing
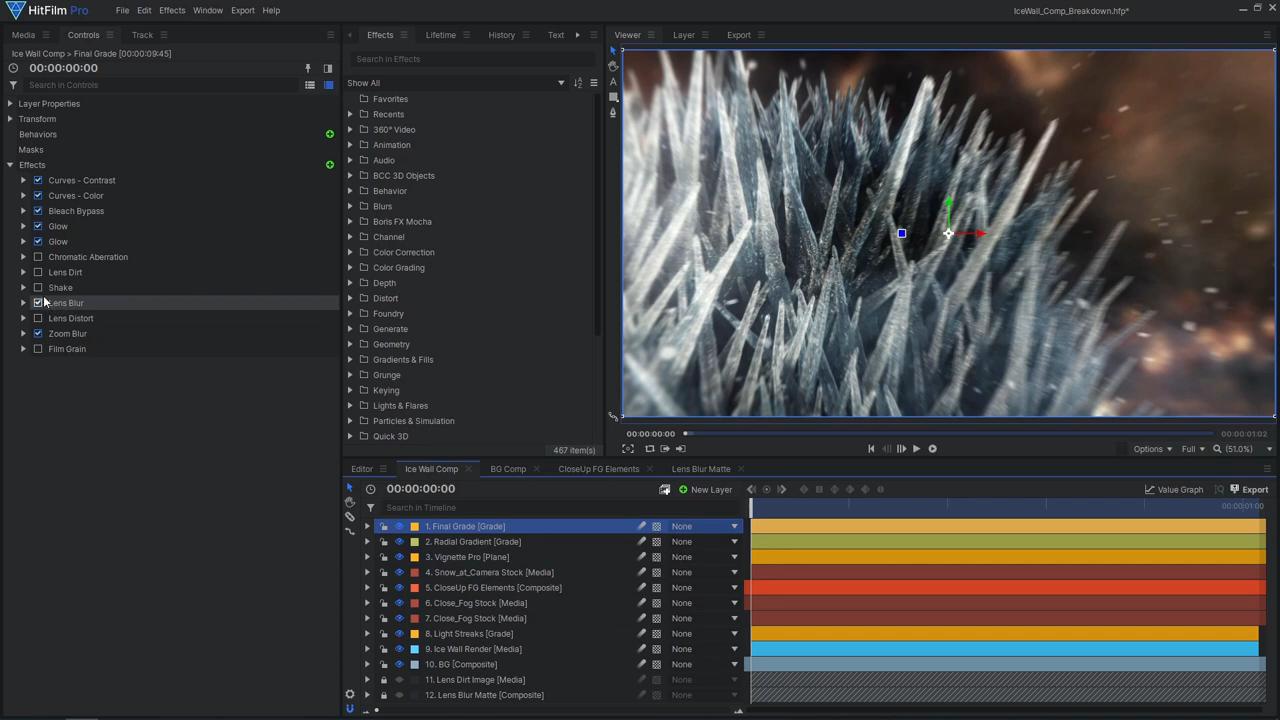
With your blitheness rendered you can begin to add the finishing touches using HitFilm. For our groundwork, we used a digital matte painting which was created by compositing a stock paradigm in HitFilm. A heavy Lens Blur result was applied to go far appear out of focus, calculation contrast between the foreground ice and this distant background. To the ice wall render itself, we applied a Curves effect to friction match the background colour and contrast, and a Light Wrap to blend the edge between the CG render and the matte painting. Additionally, a Fractal Noise effect was applied with a blend manner fix to Add, to requite the ice some sparkling details. To further raise the shine and sparkle of the water ice, a couple of Light Streaks effects were applied to a Grade layer. We had too used various stock footage elements, including fog, ash, embers, and snow to add together more movement and involvement to the foreground of this blended.
The Radial Slope effect was applied to a Grade layer to brighten upward the shot with some fake lighting. We besides practical a heavy color class to the shot to tie everything together. For this grade, nosotros used effects like Curves and Bleach Bypass to create a high-contrast, stylized look. Lens Blur, Zoom Blur, and Vignette effects were all used to draw attention towards the center of the paradigm. Some camera motion was introduced to this composite using the Milk shake and Lens Misconstrue effects. The Milkshake effect was animated to raise the intensity of the ice breaking while the Lens Distort consequence was used to create the illusion that the photographic camera was moving. This fake photographic camera movement was improved further by animating the calibration of the groundwork layer, calculation some parallax betwixt the foreground and background. Lastly, Chromatic Aberration, Lens Dirt, and Film Grain were used to add some imperfections to the shot, increasing the realism.
And that'south how you tin can create your own Mortal Kombat Sub-Naught VFX in Blender and HitFilm! Tune in next week for another Mortal Kombat themed effect. Run across you next time!
*Please note that the reason CamTrackAR tin only be used on iOS devices currently is downward to the AR camera data we are able to pull from Apple's hardware engineering science. We started with ARKit, which is amazingly good, and we are actively talking to Google nearly the best way forrad for Android – and so stay tuned!
0 Response to "Another Word for Ice Subzero Mortal Kombat Art Name"
Post a Comment